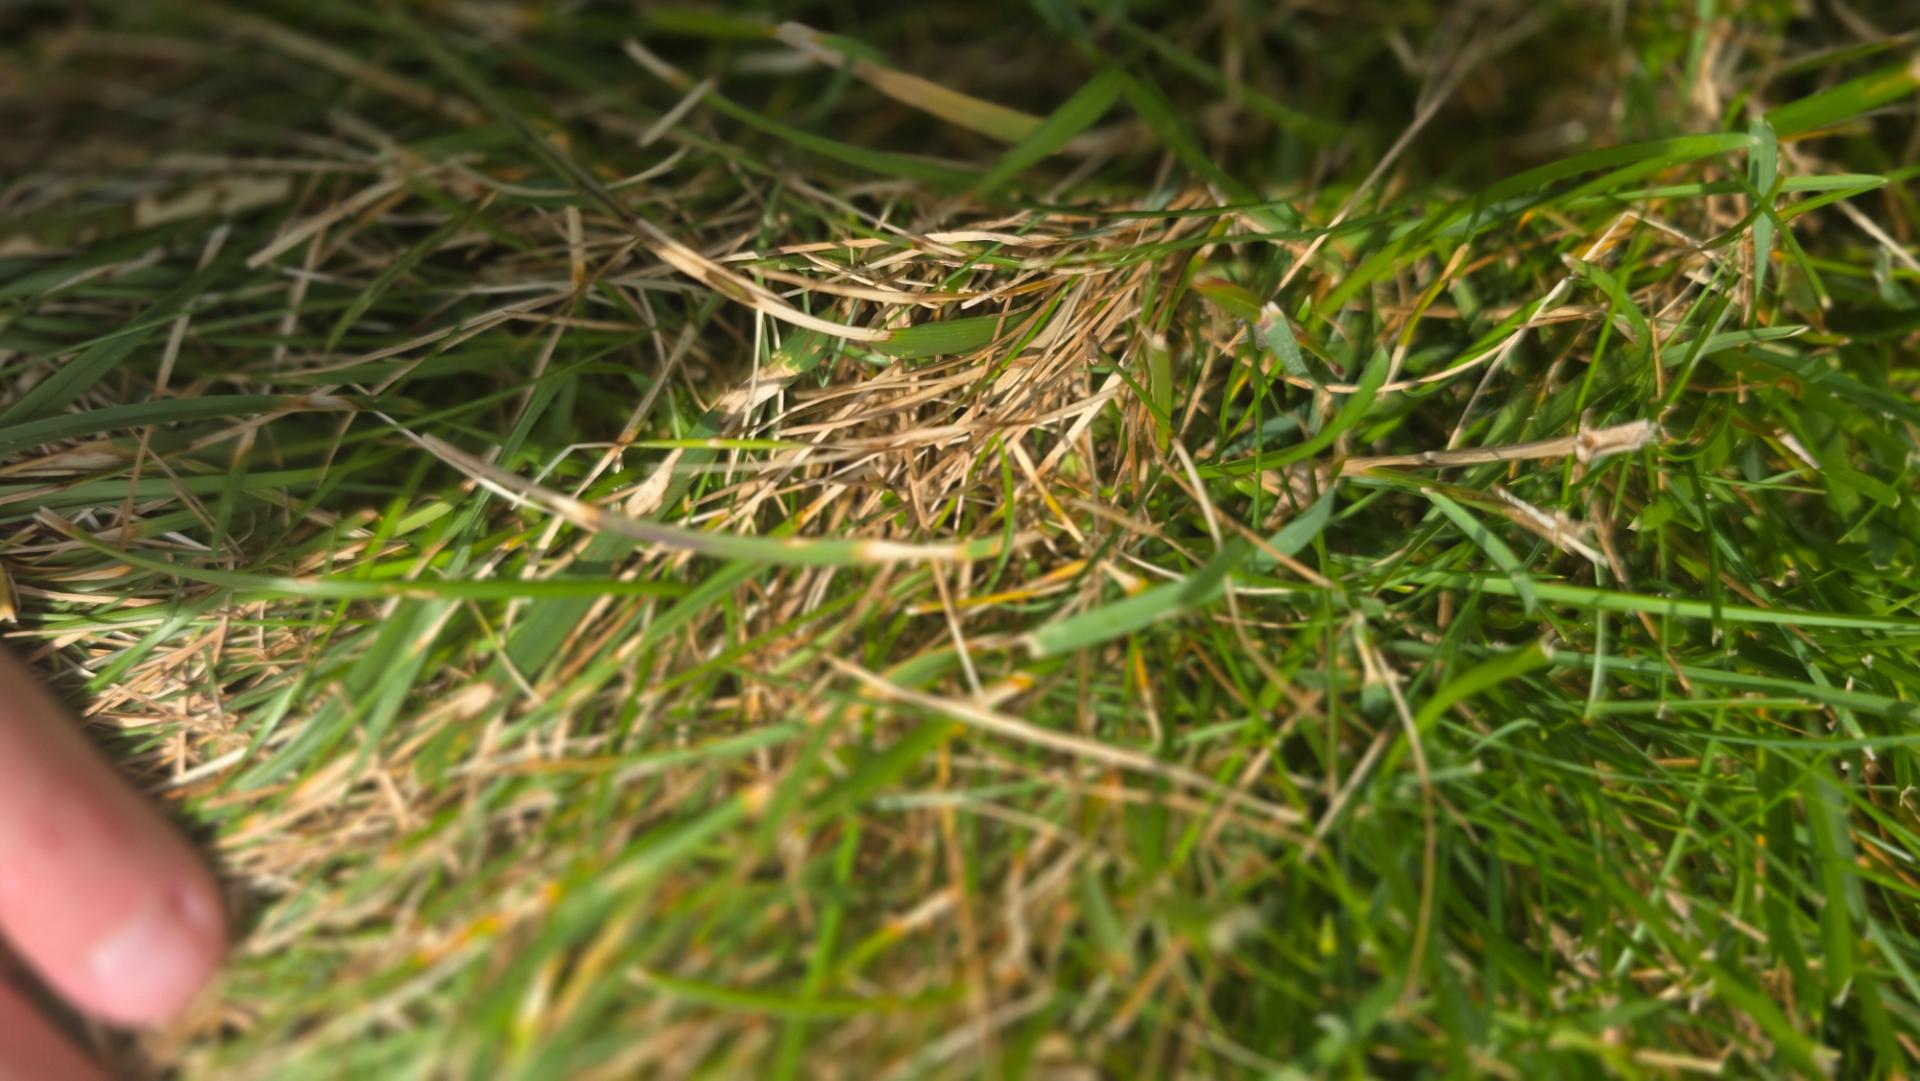
Dollar Spot vs. Brown Patch: How to Tell Them Apart and Fix Each
Dollar spot and brown patch look alike but need opposite treatments — one wants more nitrogen, the other wants less. Here's how to tell which disease is spotting your lawn and exactly how to fix each one.
Dollar Spot vs. Brown Patch: How to Tell Them Apart and Fix Each
Published on LawnMaps.com | Estimated read time: 5 minutes
Your lawn was looking great, and then almost overnight it broke out in spots. Maybe a scatter of small tan circles, maybe a few big rings of thinned-out grass. Either way, your first question is the right one: what is this, and how do I stop it?
Two of the most common summer lawn diseases — dollar spot and brown patch — get blamed for each other constantly. They look similar enough from the porch that a lot of homeowners guess wrong, buy the wrong product, and watch the damage keep spreading. The good news: once you know the tells, they're actually pretty easy to separate. And the fixes are different, so getting the ID right genuinely matters.
Let's walk through it.
First, a quick word on lawn fungus
Both of these are fungal diseases. Fungus is always present in your soil — it's normal. It only becomes a problem when the weather turns in its favor: heat, humidity, and grass that stays wet for hours at a time. That's why disease flares up in the muggy stretch of summer and not in April.
That also means the single most powerful thing you can do isn't spraying — it's changing the conditions the fungus loves. More on that below.
How to tell them apart
Grab a close look at an affected area, ideally in the early morning when dew is still down. Here's what separates the two.
Dollar spot
- Patch size and shape: Small, roughly circular spots about the size of a silver dollar up to a few inches across. You'll usually see many of them, and they can merge into bigger blotchy areas.
- Color: Straw-tan to bleached white.
- The tell-tale sign — the blade lesion: Look at an individual grass blade. Dollar spot leaves a bleached, tan band across the blade with a distinct reddish-brown border on each side — often shaped like an hourglass. This is the clincher.
- Morning cobwebs: In heavy dew you may spot fine, cottony webbing (fungal mycelium) on the grass. It disappears as the dew dries.
- What sets it off: Warm days, heavy dew or humidity, and — this surprises people — a lawn that's a little underfed. Dollar spot loves grass that's hungry for nitrogen.
Brown patch
- Patch size and shape: Larger circular or irregular patches, from dinner-plate size up to several feet across. You'll typically see a handful of big ones rather than dozens of little ones.
- Color: Light brown, thinned-out grass in the middle.
- The tell-tale sign — the "smoke ring": In early morning, look for a grayish, smoky-purple ring of wilted grass around the edge of the patch where the fungus is actively feeding. It fades as the day dries out.
- Blade lesions: Irregular tan spots with dark brown borders on the leaves.
- What sets it off: Hot, humid weather — daytime temps in the 80s–90s with warm, sticky nights above 65°F — plus grass that's growing lush from too much nitrogen. Tall fescue is especially prone to it.
The cheat sheet
| Clue | Dollar Spot | Brown Patch |
|---|---|---|
| Number of spots | Many (dozens) | Few (a handful) |
| Size of each spot | Silver-dollar to a few inches | Dinner-plate to several feet |
| Color | Straw-tan to bleached | Light brown, thinned center |
| Blade lesion | Bleached band, hourglass shape, reddish-brown border | Irregular tan spots, dark borders |
| Morning giveaway | Cottony webbing in dew | Grayish "smoke ring" at patch edge |
| Nitrogen link | Too little nitrogen | Too much nitrogen |
| Weather | Warm + heavy dew | Hot + humid, warm nights |
A quick real-world note: if you're counting around 30 separate spots on a tall fescue lawn, that number alone points more toward dollar spot — brown patch tends to show up as just a few big rings, not dozens of little ones. Confirm it by checking a blade for that hourglass lesion.
See it in a real lawn: diagnosing dollar spot step by step
Charts are helpful, but nothing beats seeing the real thing. Here's an actual tall fescue lawn in mid-July — the owner had put down a low-nitrogen, high-potassium fertilizer a few weeks earlier — walked through exactly how you'd diagnose it in your own yard.
Step 1 — Stand back and read the pattern.
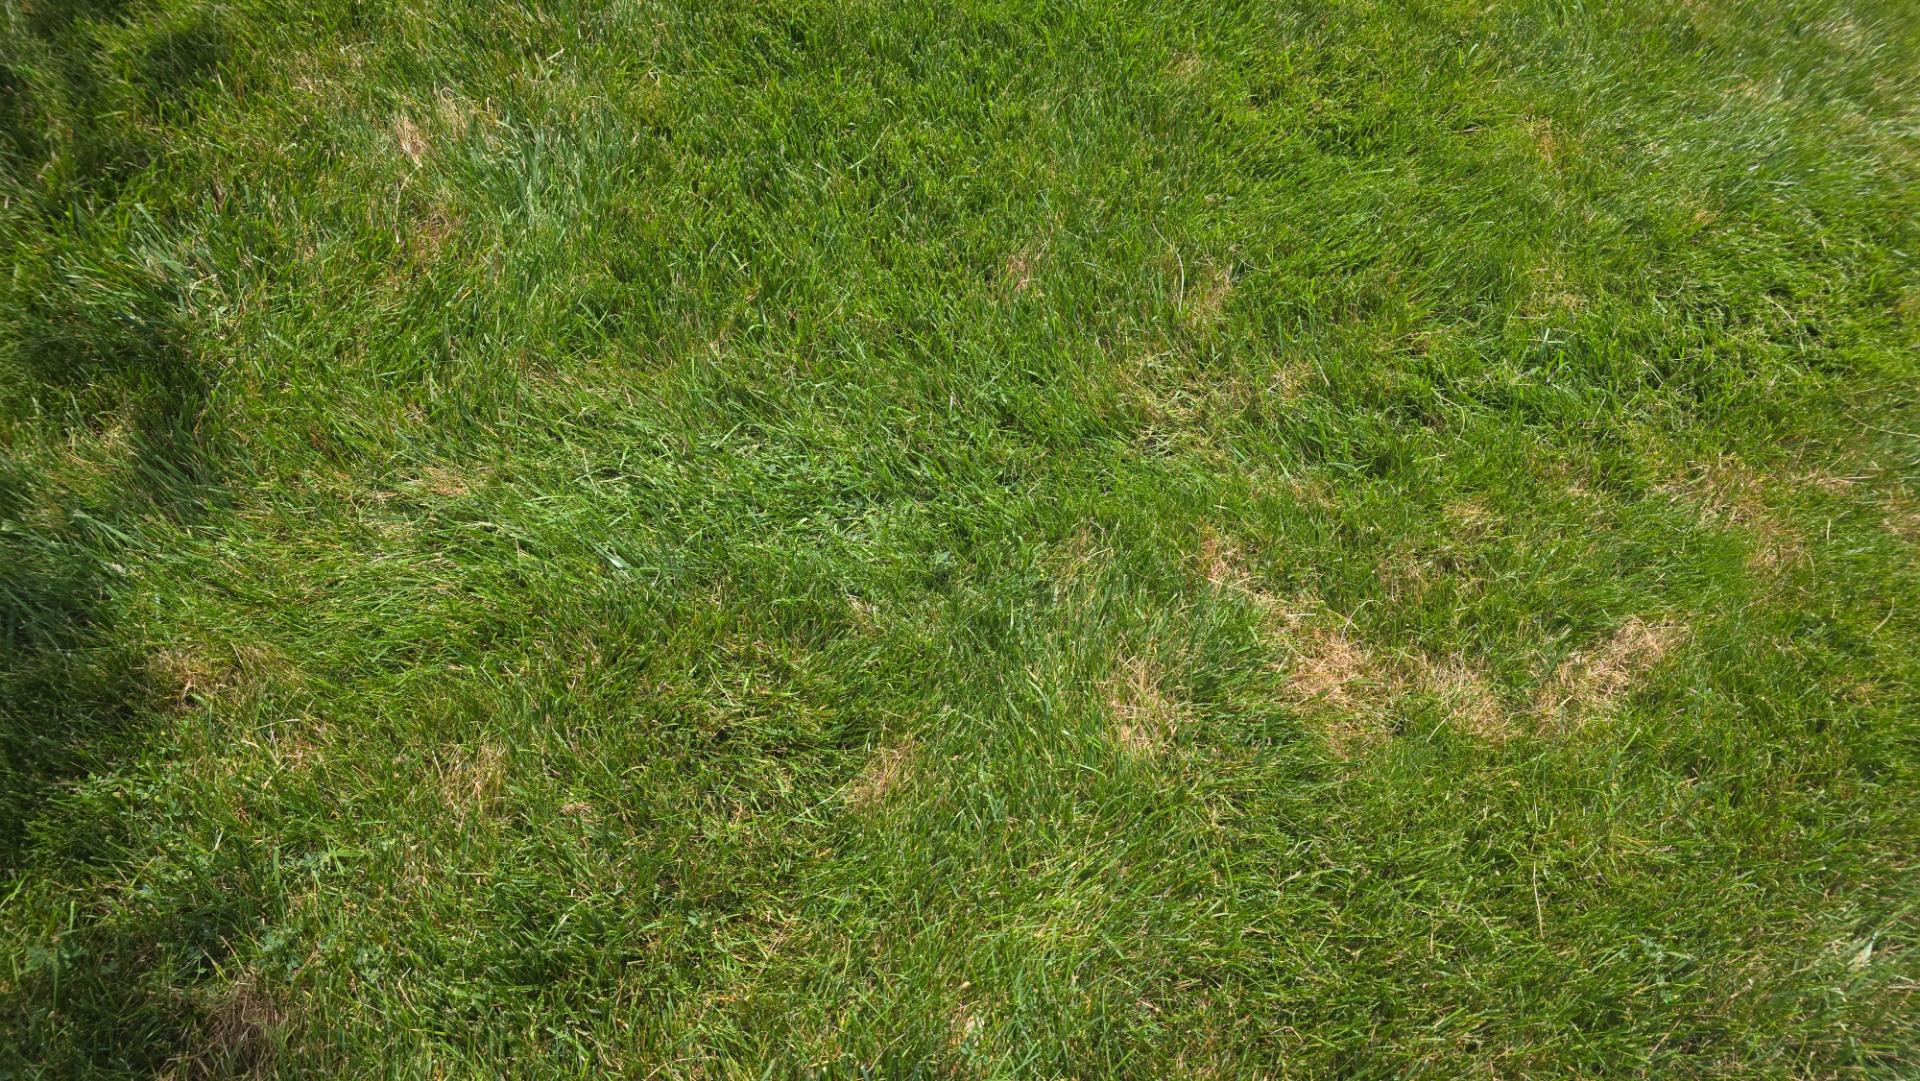
Many small, straw-colored spots scattered across an otherwise green lawn — the "measles" look of dollar spot. If this were brown patch, you'd see a few large rings instead of dozens of little ones.
The very first thing to check is the pattern, not any single spot. Lots of small spots sprinkled everywhere points to dollar spot. A handful of big circular patches points to brown patch. This lawn has the classic dollar spot scatter.
Step 2 — Get down close to one spot.
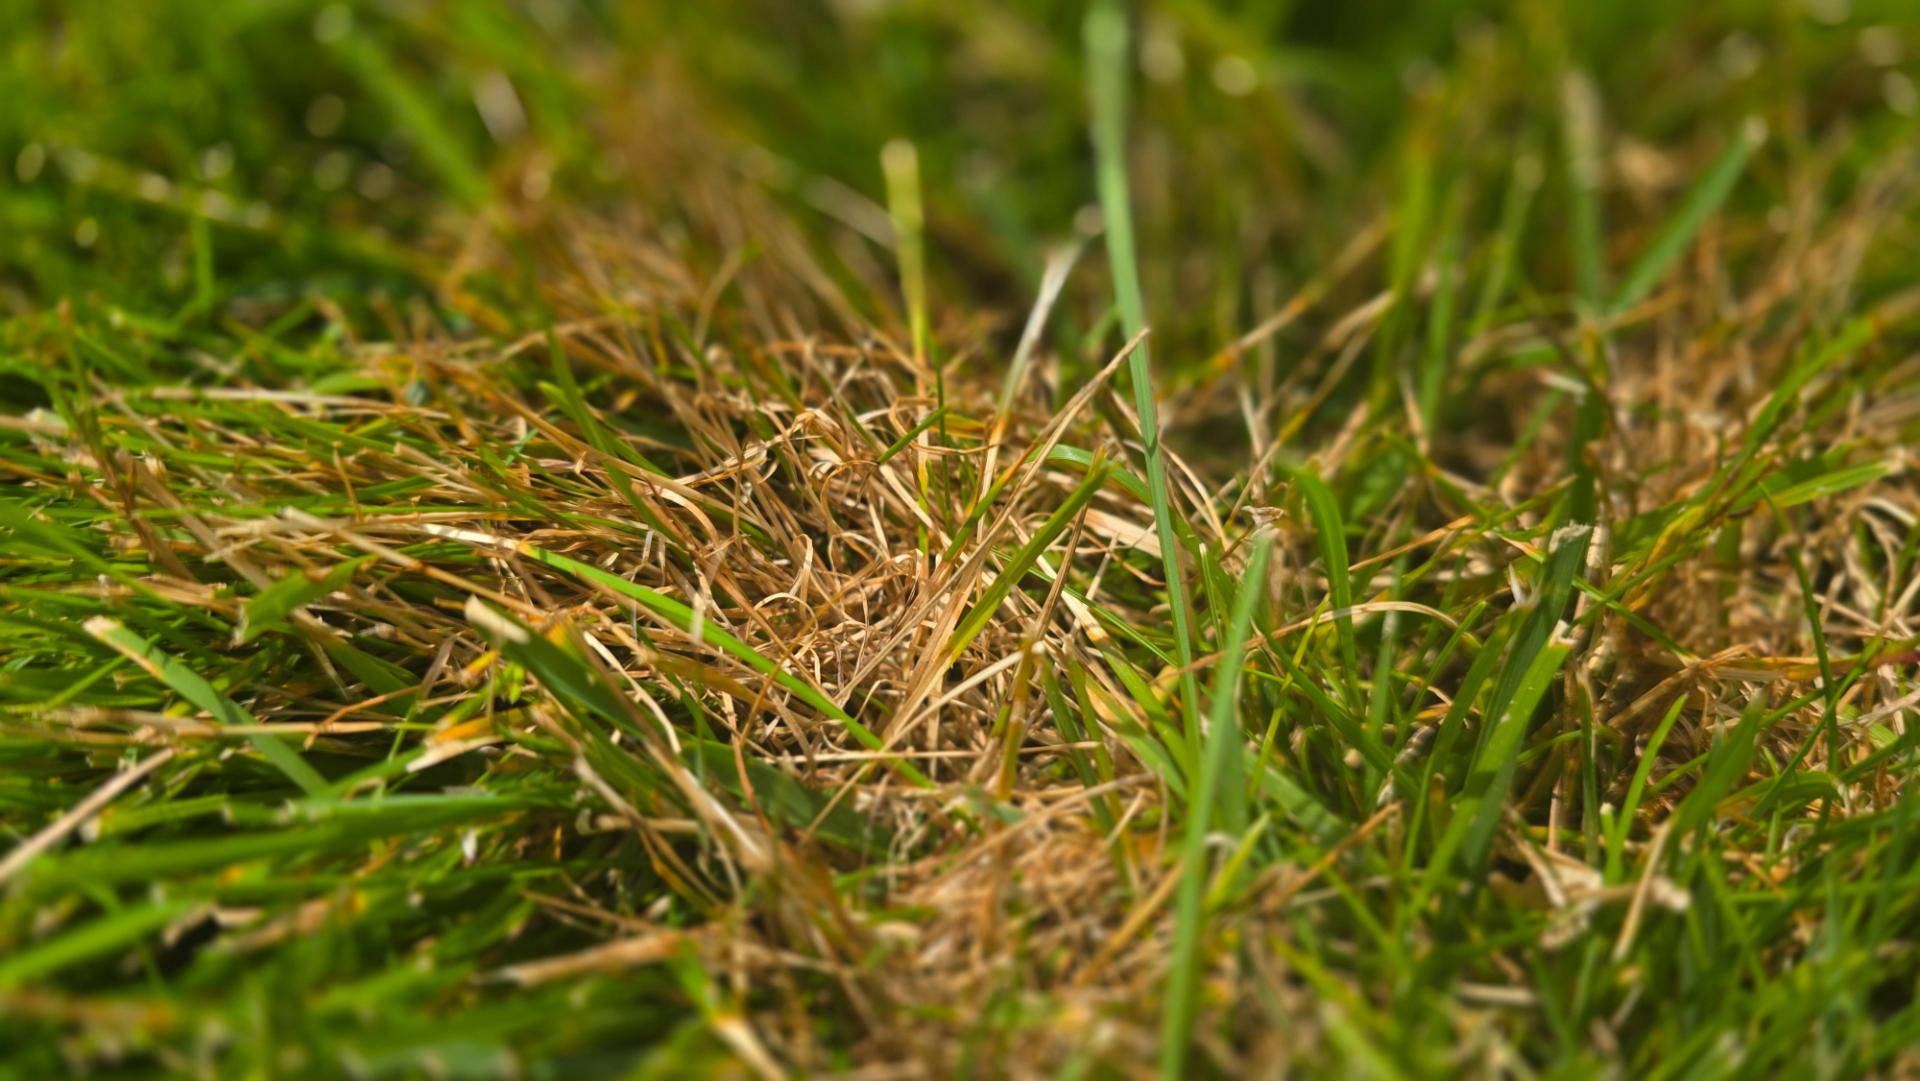
Up close, the damage is bleached straw-tan — and notice the green, living blades still standing right in the middle. That mix of dead-tan and alive-green within a small spot is very dollar spot. Brown patch tends to collapse the whole area into a grayer, matted patch.
Step 3 — Check the size against something familiar.
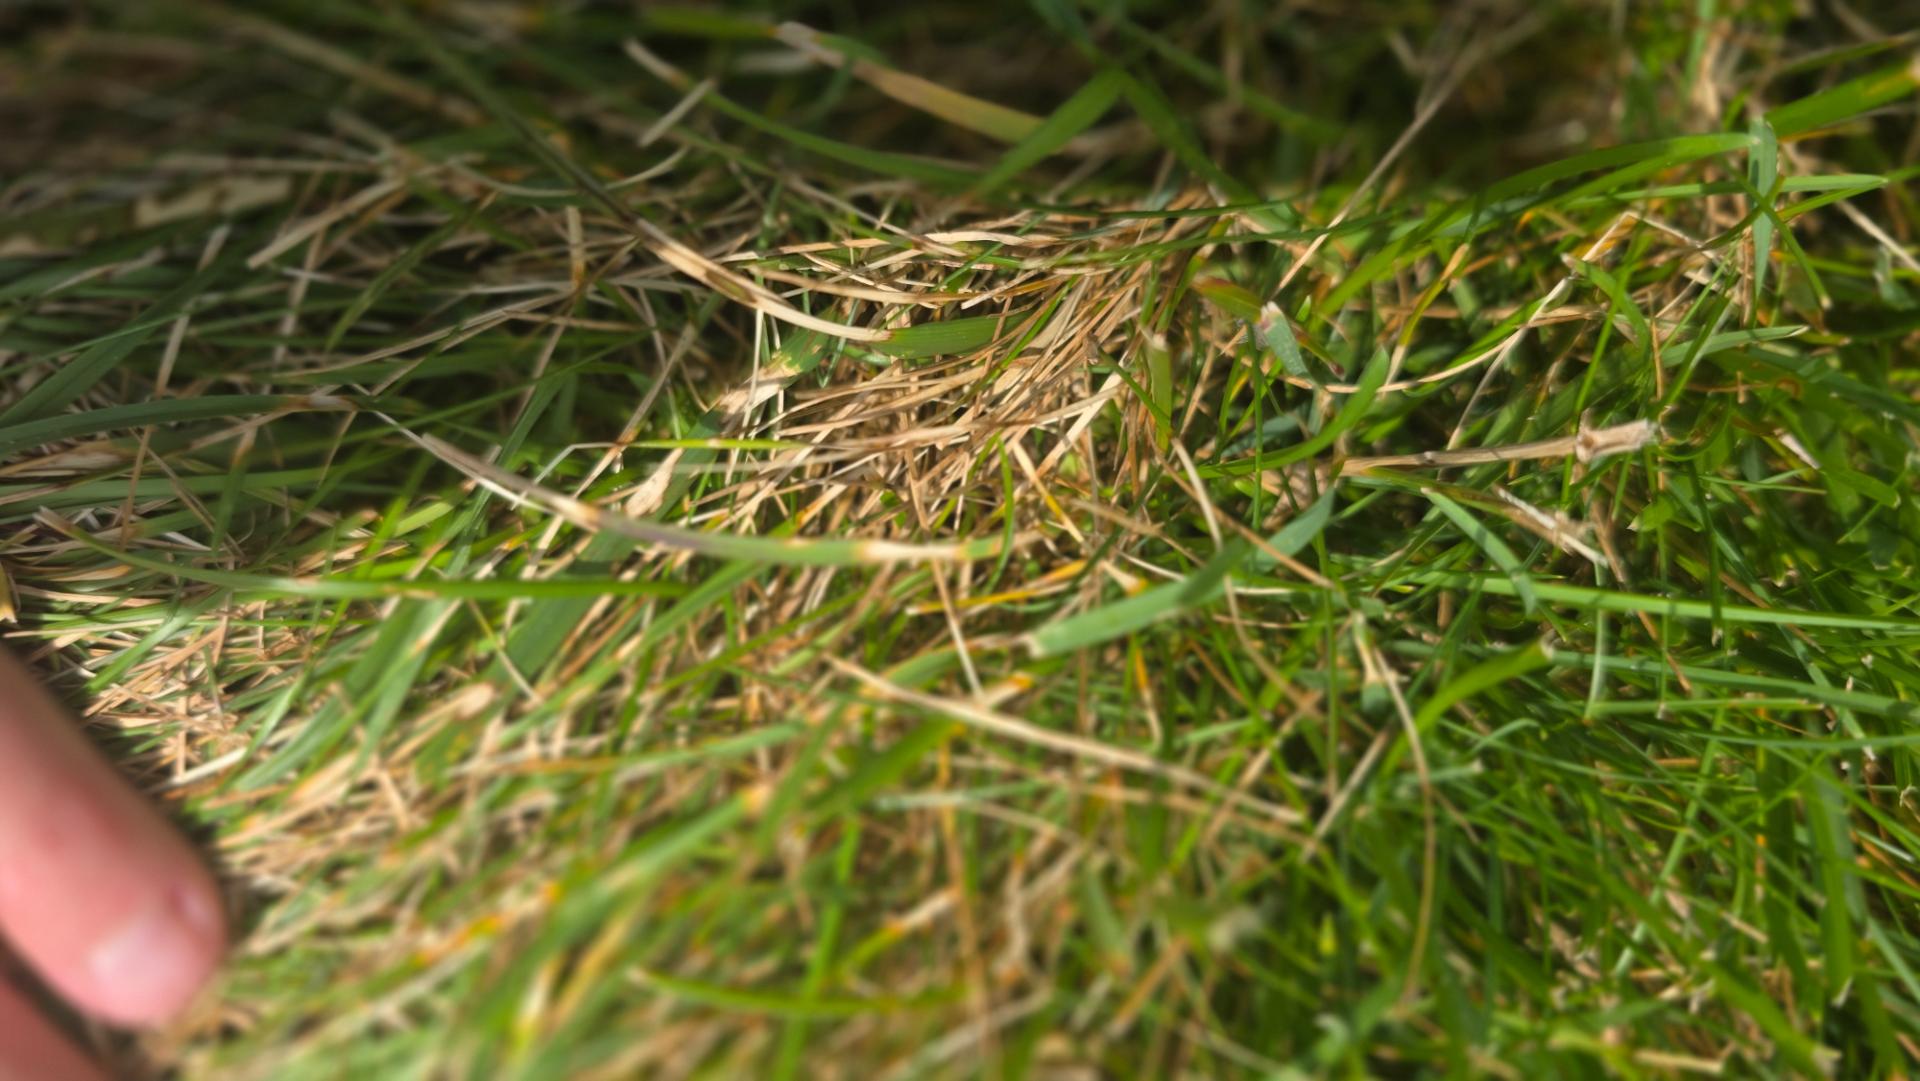
A finger for scale shows these spots are only a couple of inches across — silver-dollar sized, exactly what the name describes.
Step 4 — Inspect an individual blade.
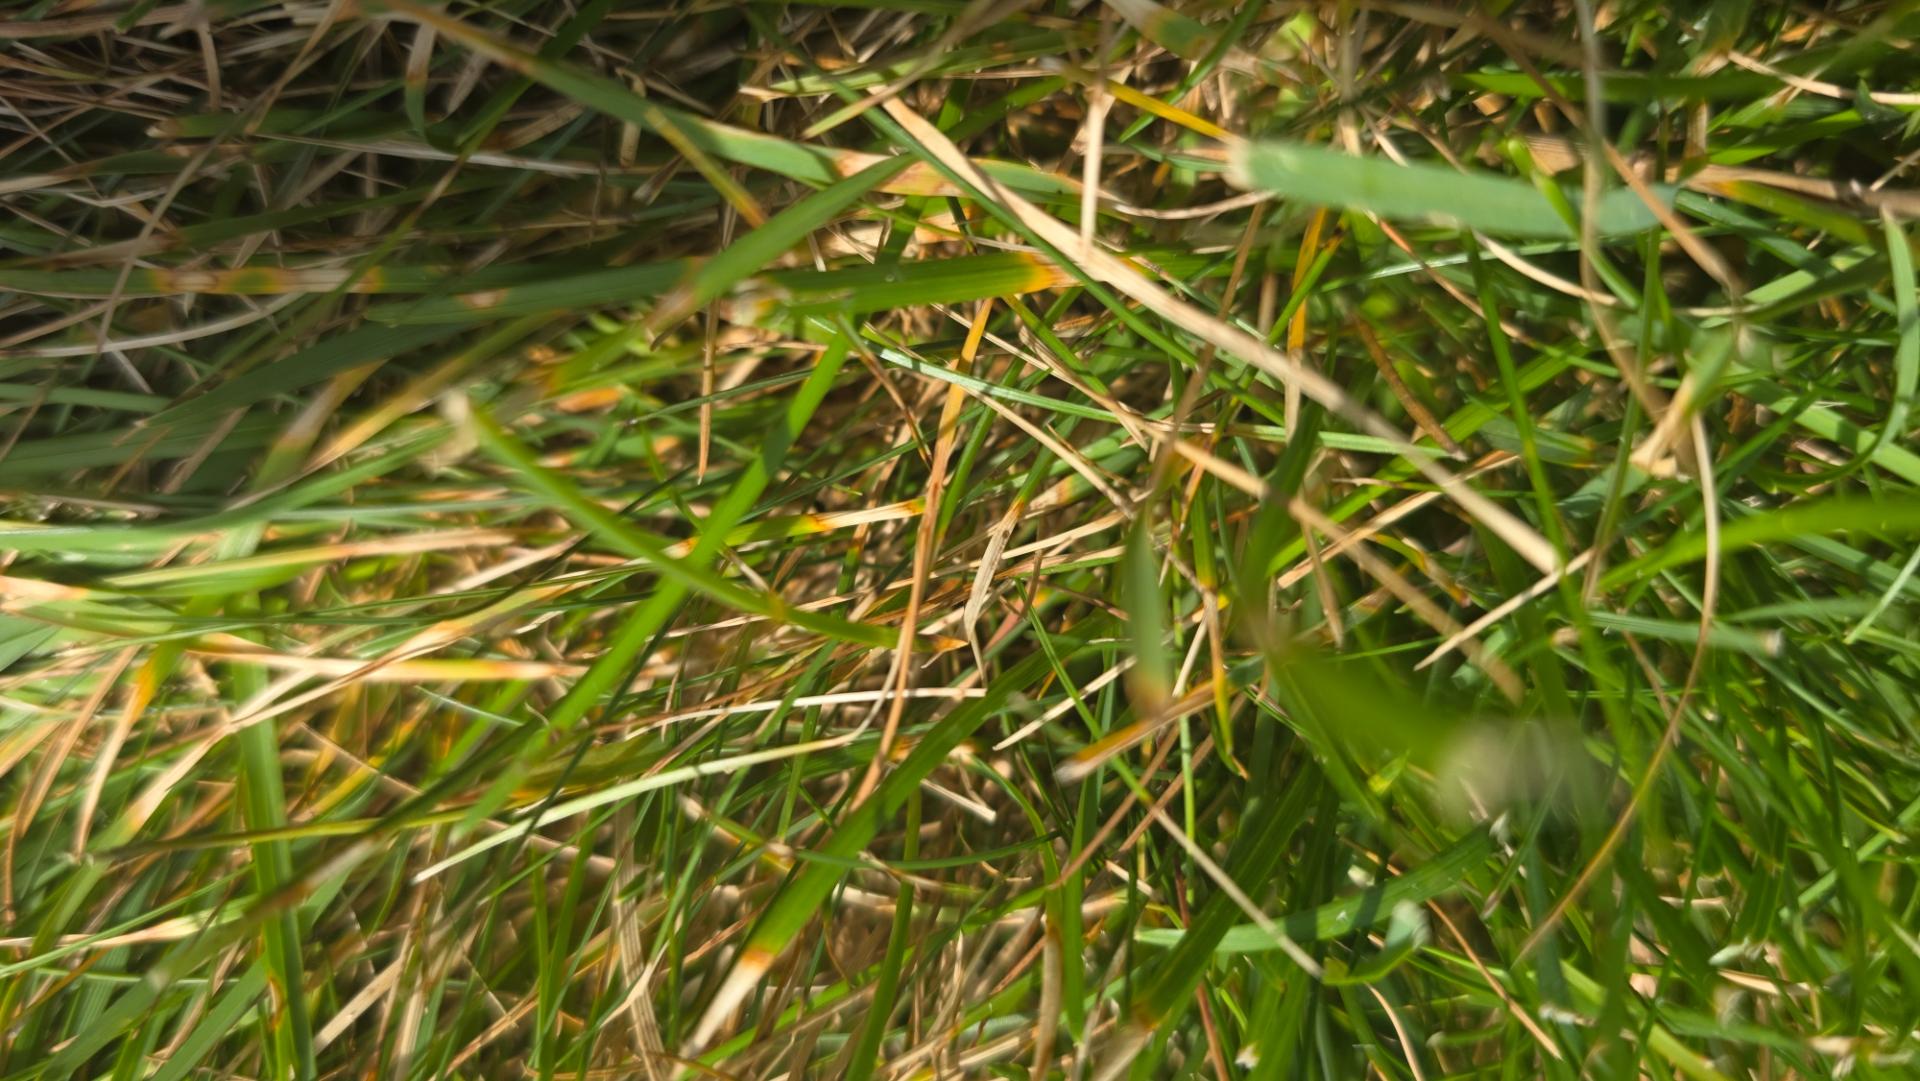
Pull a few affected blades and look for a tan, bleached band crossing the leaf — often pinched in like an hourglass, with a thin reddish-brown line bordering it. Combined with everything above, that lesion seals the diagnosis.
The verdict: many small spots + bleached straw color + green blades surviving inside the spots + a lawn running low on nitrogen = dollar spot, not brown patch. One more free check: step out early in the morning while the dew is still down and look for fine, cottony webbing on the spots. If it's there, you've confirmed it.
How to fix each one
For both diseases, the playbook is the same order of operations: fix the conditions first, then reach for a fungicide only if you need to. Cultural fixes are free, they prevent the next outbreak, and they make any fungicide you do use work better.
Cultural fixes that help both
- Water early in the morning, deeply and infrequently. The goal is to get the grass dry by evening so the fungus doesn't get the long stretch of leaf wetness it needs. Never water in the evening. (Our guide on watering your lawn the right way covers the timing in detail.)
- Mow at the right height and keep blades sharp. Mow high, and keep the blade sharp. In summer, taller is better. For tall fescue, mow at the high end — around 3.5 to 4 inches through the hot months. Taller grass shades the soil, keeps the roots cooler and holding moisture, and stands up to heat and disease far better than a short cut. Cutting too short stresses the grass, and a dull blade shreds the tips and leaves open wounds the fungus can move into.
- Improve airflow and drainage. Anything that helps the lawn dry faster — thinning out overhanging branches, dethatching, aerating compacted soil — takes away the humidity the fungus depends on.
- Don't mow when it's wet. You'll spread fungal spores from patch to patch on your mower.
The one that's different: nitrogen
This is where the two diseases split, and it's why the ID matters:
- Dollar spot? A light feeding of nitrogen often helps the grass outgrow the damage. Your hungry lawn is part of the problem. (If you're not sure what those fertilizer bag numbers mean, our N-P-K guide breaks it down.)
- Brown patch? Do the opposite — hold off on nitrogen until the weather cools. Feeding it now pours fuel on the fire by pushing the soft, lush growth brown patch feasts on.
Same brown spots, opposite fertilizer advice. Guess wrong and you can make it worse.
If you go the fungicide route
Most lawns recover with cultural fixes alone, especially dollar spot. But if the disease is spreading fast or you want to protect a lawn you've invested in, a fungicide can help. A few things worth knowing:
- Watch out for this common mistake: the widely sold homeowner product with azoxystrobin as its only active ingredient works on brown patch but has almost no effect on dollar spot. If you've got dollar spot, that popular box off the shelf won't do much.
- Active ingredients that work: look for propiconazole (effective on both), or combination products that pair a strobilurin with a DMI fungicide (for example azoxystrobin + propiconazole, or pyraclostrobin + triticonazole). Chlorothalonil is another reliable option for dollar spot.
- Follow the label on rate and timing — usually reapplied every 14–28 days while conditions stay favorable.
Your next steps
- Walk the lawn in the early morning and get down close to a spot.
- Count and measure: many small spots = likely dollar spot; a few big rings = likely brown patch.
- Check a blade for the hourglass lesion (dollar spot) or look for the smoke ring (brown patch).
- Fix watering and mowing first. Then adjust nitrogen based on which disease you have.
- Only reach for a fungicide if it keeps spreading — and match the active ingredient to the disease.
Get the conditions right and most summer disease clears up on its own as the grass grows out of it. The fungus never really leaves your soil, but you control whether it gets the weather it needs to take over.
Knowing when your lawn is most vulnerable is half the battle. LawnMaps tracks soil temperatures for your property, so you can see when you're heading into peak disease weather and get ahead of it. And when it's time to treat, map your lawn for free at LawnMaps.com to calculate exactly how much product you need — no guessing, no overbuying.